Standards and Procedures:
Locust Log Check Steps
There are many ways to build a locust log staircase. One of the most commonly employed designs is check steps/check dams, where a series of logs are set perpendicular to the tread and anchored in place with rebar or locust stakes, with the goal of “checking” the flow of water and sediments. While check steps are a simple method of building staircases, they don’t tend to hold up well over time, especially in an area as rainy as the Pisgah Ranger District. It is very easy to find examples of check steps that have been undercut or blown out, turning into high, unsightly obstructions that users avoid. This creates a wide, braided trail and more resource damage as users go off trail to dodge these failed steps. Adding insult to injury, this ultimately wastes black locust wood, a precious resource that regenerates slowly in the heavily forested Pisgah Ranger District.
Due to these downsides, the Pisgah Ranger District is moving away from check steps and toward more sustainable solutions such as thelog ladder staircase or log box steps. In most cases where log steps are needed to mitigate a steep grade, a log ladder staircase is the best option. That being said, there may be certain instances, as in extremely gullied stretches of trail, that check steps (and the closely related check dams) can still be an appropriate tool. With careful attention to proper construction, the weaknesses of check steps can be largely mitigated. Improper construction, however, tends to make the trail worse over time rather than improving it.
Key Points:
-
– Tools and equipment needed
-
– General standards
-
– Construction procedures
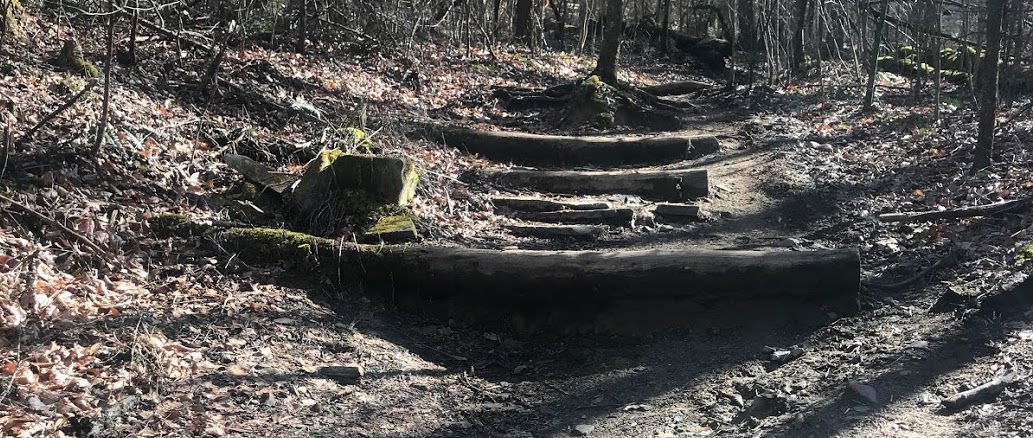
- The Danger of Check Steps
A classic example of how check steps often turn into obstacles when they undercut. Note the way the trail has expanded to the right as users avoid the high steps. - Log Ladder Staircase: A More Sustainable Option in Most Cases
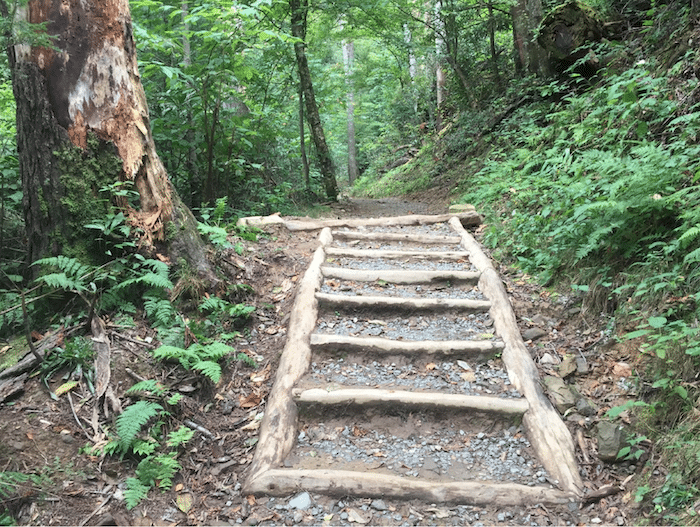 A log ladder staircase built in the Smokies. For steep sections that aren’t deeply gullied yet, this is the more sustainable design because all steps are tied into side rails and part of one unified structure. Nothing can shift and all fill is retained. Note the water bar incorporated into the top of the staircase design. It is essential to incorporate drainage above all staircases, regardless of design.
Log Check Steps – Recommended Tools and Equipment
- Below is a list of the essential items for building log check steps.
- – Chainsaw with a sharp chain
- – Extra sharpened chain recommended
- – Draw knives for peeling bark
- – All appropriate PPE for chainsaw work
- – Single-jack or double-jack sledge hammer for crushing rock and tamping fill
- – Level
- – Tape Measure
- – Lumber crayon, marker, etc to mark measurements on locust
- – Assorted digging tools (pick, pulaski, etc)
- – Buckets or canvas rock bags for transporting gravel
-
Log Check Steps: General Standards
-
– Choose check steps for deeply gullied stretches of trail where restoring drainage or sheet flow is no longer a feasible option. For steep sections that are not deeply gullied, choose another design like ladder staircase or box steps instead whenever possible.
– Prevent undercutting – the top of each step needs to be level with (or slightly higher than) the bottom of the step above it. This should create a level landing from front to back with no gap underneath the above step. This principle cannot be emphasized enough – it is critical for preventing check steps from failing and making the trail worse than before.
– Set logs in the ground so approximately ¼ of the log is below ground. This also helps to prevent undercutting.
– Individual steps should be no higher than 6-8”. Any higher and they become uncomfortable, leading users to avoid them and causing trail braids.
– Fill behind steps with crushed rock or imported gravel, not soil. Pack the rock firmly with hammers. Top with a layer of mineral soil.
– Extend both ends of check steps into the banks of the gully. Aim for at least 1 foot into each bank. Lock these ends firmly in place with crushed rock, using sledges. Failure to adhere to this principle leads to water washing around the sides of the log, eventually cutting channels.
– Check steps should not rely on stakes or rebar to stay in place. Crushing the ends deeply into stable banks should provide stability. If stable banks aren’t present, check steps are not the best solution.
– Keep a tread length (or “run”) of 10-12” when possible. The tread length will vary, however, depending on how steep the slope is.
– Whenever possible, start a run of check steps where the grade is flat and then work your way up.
– If you must start a run of check steps on a grade, bury the bottom step as a way to prevent undercutting on the above steps.
– Steps should be level from side to side.
– Incorporate drainage above the staircase whenever the gully becomes shallow enough to install a drain. Without drainage these steps will eventually fail, so establishing drainage is essential and should be part of the overall plan and goal for a set of check steps.
– “Check dams” are the same as check steps except generally they aren’t filled, and are used on decommissioned, gullied trails as a way to trap sediments and gradually promote restoration. Unfilled check dams should not be installed on active trails, as they become obstacles for users to step over, which can lead to trail braiding when users avoid the obstacles.
Construction Procedures
-
These procedures are intended to provide a helpful reference guide to building check steps, ensuring you cover the essentials. If you are new to building this structure, it is best to learn hands-on from an experienced trail builder.
A. Survey the Site
1. Is the trail gullied deeply enough, with stable banks, to justify check steps, or would a log ladder staircase be a better choice?
2. Consider using a line level to estimate the number of steps you’ll need and the proper spacing to end up with level tread landings.
B. Cut Locust to Length
1. Width of the trail, plus enough extra length to go 1 foot into either bank.
C. Install Steps
1. Examine log to find the flattest surface to have on top.
2. Dig a shallow trench across trail and 1 foot into both sides of the bank.
3. Drop log into place.
4. Approximately ¼ of log diameter should be underground.
5. Check for level.
6. Fill behind step with crush/gravel and tamp thoroughly.
7. Fill around all edges of the log that are embedded in the banks, tamp thoroughly with hammers to lock the ends of the log into place.
8. Repeat.
D. Finish Work
1. Fill/tamp crush as needed to fill any remaining gaps.
2. Establish sustainable drainage above steps.
3. Top landings with mineral soil.
4. Revegetate work area as needed.